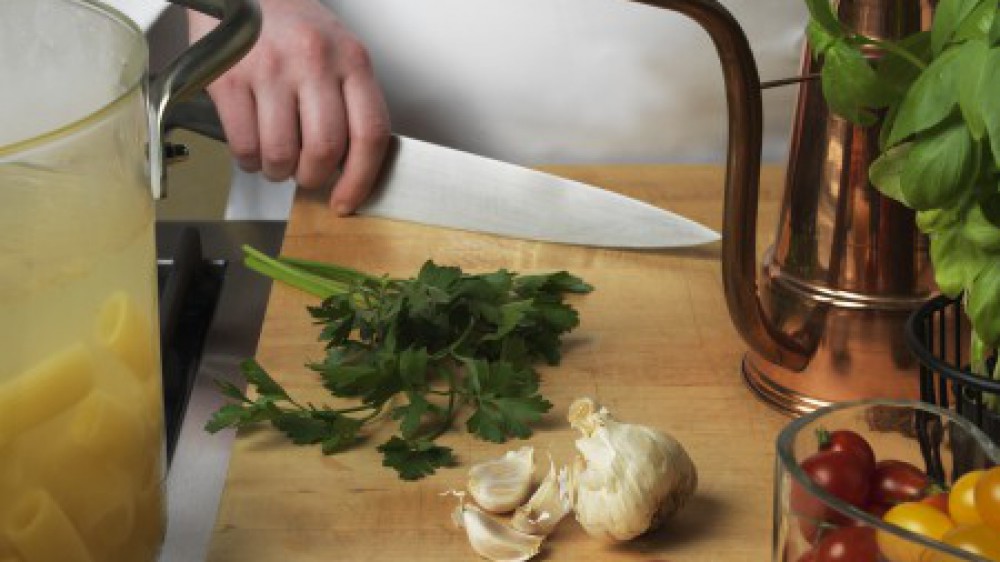

Italian Sausage Contadina with Roasted Sweet Peppers, Potatoes, and Onions
Adapted from Cooking School Secrets for Real World Cooks by Linda Carucci
Serves 4 to 6
2 small yellow onions (about 4 ounces each)
12 medium cloves garlic
1 pound medium Yukon Gold or new potatoes (about 5 medium)
2 tablespoons plus 1 teaspoon extra virgin olive oil, divided
1 teaspoon kosher salt, divided
1/8 teaspoon freshly ground black pepper
4 bell peppers: red, yellow and/or green
1-1/2 pounds fresh hot or mild Italian sausage links, or a combination
Crusty Italian bread, for serving
Preheat the oven to 425 degrees F (or 400 degrees, Convection). Spray a 13- by 17-inch rimmed baking sheet generously with vegetable cooking spray. Set aside.
Trim off hairy roots close to the base of the onions, cut off the stem ends, and remove peels. Cut lengthwise into quarters and place in a large bowl. Set aside.
Remove all but the last papery layer of peel from the garlic cloves. Trim off any long, scraggly ends so they don’t burn. Add garlic to the bowl with the onions.
Scrub the potatoes, cut out any eyes, and peel away any green spots. Cut the potatoes into quarters and place in the bowl with the onions and garlic. Toss with 1 tablespoon of the olive oil, 1/2 teaspoon of the salt, and the pepper. Transfer to the prepared baking sheet and reserve the bowl. Arrange the potatoes and onions cut-side down in the pan. Roast for 15 minutes.
While the potatoes are roasting, cut the peppers into long strips, about 3/4-inch wide. Place in the reserved bowl and toss with 1 tablespoon of the olive oil and the remaining 1/2 teaspoon kosher salt. After the potatoes have roasted for 15 minutes, scatter the peppers all over the baking sheet without moving other items on the baking sheet. Roast for 10 minutes. Remove from the oven and use a thin pancake spatula to turn the potatoes cut-side up.
While the peppers are roasting, heat a 10-inch sauté pan over medium heat. Add the remaining 1 teaspoon olive oil and swirl to film the pan with oil. With the tip of a paring knife, prick the sausages a few times on each side to allow fat to drain off as they brown. When the pan is hot, add the sausages and sauté, turning as they brown, until brown on all sides, but not cooked through, about 8 minutes. Use a splatter screen, if desired. Transfer the sausages to a cutting board and let rest for 5 minutes. Cut each link into 4 chunks and then arrange them on top of the peppers. Roast until the potatoes are creamy-soft inside and crisp on the outside, about 20 more minutes. Transfer to a warm bowl and serve with sliced bread, encouraging guests to squeeze the roasted garlic onto the bread.
Copyright Linda Carucci. All rights reserved.
Stir-Fried Velvet Chicken with Cashews
Adapted from Cooking School Secrets for Real World Cooks by Linda Carucci
Velveting is a traditional Chinese cooking technique most often used with chicken or shrimp. A simple procedure, velveting creates juicy, super-smooth morsels, which, in this recipe, are then stir-fried with asparagus, red bell peppers, and aromatics. For velveting, chicken is typically cut into bite-size pieces, marinated in a seasoned egg white marinade, and then blanched in warm peanut oil, which binds the egg white to the chicken, creating a delectably soft exterior. However, in this recipe, steaming water stands in for peanut oil for the blanching step.
Secrets
- The late, great Chinese cooking authority, Barbara Tropp, turned me on to this simple velveting technique in which marinated chicken is blanched in hot water instead of the traditional hot oil. Follow the steps below to create incomparably tender and moist chicken breast chunks.
- Cornstarch is used in both the marinade and sauce. To prevent cornstarch from becoming lumpy, always add cold or room temperature—never hot—liquids to cornstarch. Keep a spoon or chopstick handy to stir the slurry just before adding it to the sauce, as the cornstarch tends to settle to the bottom.
- Use a spoon to scrape off the peel before grating fresh ginger. To prevent it from becoming stringy, grate ginger crosswise on a Microplane or on the small holes of a box grater.
- If your garlic has green sprouts coming out of the center, cut the clove in half lengthwise and remove the sprouts. While they represent part of the natural life cycle of a garlic clove, the sprouts, if eaten, can cause indigestion.
- If using raw cashews, fry them quickly in the hot oil (before adding the stir-fry ingredients) until they turn deep golden brown. Use a Chinese strainer or slotted spoon to drain and transfer the “roasted” nuts to a heatproof bowl. Set them aside and continue with the stir-fry.
Serves 3 to 4
Marinade
1 tablespoon cornstarch
1 teaspoon kosher salt
1 tablespoon Chinese Shaoxing rice wine, dry white vermouth, or dry white wine
1 large egg white
1 pound boneless, skinless chicken breasts (3 or 4 breast halves), cut into 1-inch pieces
Sauce
1/2 teaspoon cornstarch
1/4 cup chicken stock, homemade or low-sodium, if canned
2 tablespoons soy sauce
1 1/2 tablespoons Chinese Shaoxing rice wine, dry white vermouth, or dry white wine
1 teaspoon toasted sesame oil
1 teaspoon sugar
Stir-Fry
2 tablespoons peanut oil
1/4 to 1/2 teaspoon crushed red chili flakes
1 red bell pepper, cut into 1/2-inch strips, then cut on the diagonal into diamonds
8 ounces pencil-thin asparagus, tough ends removed, cut on the diagonal into 1-inch pieces
3 green onions, green and white parts, cut on the diagonal into thin slices
1 teaspoon finely grated ginger with juices
3 cloves garlic, cut into thin slices
1/3 cup unsalted roasted or raw cashews (see note above if using raw cashews)
Steamed rice, for serving
Marinate the chicken: In a medium mixing bowl, combine the cornstarch and salt. Add the wine and egg white and then whisk vigorously until lumps disappear. Stir in the chicken chunks. Set aside to marinate for at least 10 minutes, or cover and refrigerate for 1 to 24 hours. (If refrigerated, bring the chicken to room temperature at least 30 minutes before proceeding.)
Make the sauce: In a small bowl, combine the cornstarch, chicken stock, soy sauce, wine, sesame oil, and sugar. Stir and then set aside. (The mixture will need to be stirred again before adding to wok.)
Velvet the chicken: In a 4-quart saucepan, heat 1 quart of water to almost simmering. Place a colander or sieve in the sink. Regulate the heat so the water in the pan is just steaming, not boiling or simmering. With a Chinese strainer or large slotted spoon, add the marinated chicken to the steaming water. Stir with a chopstick to separate the pieces. The egg white will become stringy in the water. Cook just until the outside edges of the chicken pieces turn white, less than 1 minute (the chicken will not be cooked through). Transfer the chicken to the reserved colander and let drain.
Make the stir-fry: Heat the peanut oil in a wok or stir-fry pan over high heat. Add chile flakes and stir-fry for 15 seconds. Add the red bell peppers and asparagus and stir-fry for 2 minutes. Add the green onions and stir-fry for 30 seconds. Add the ginger and garlic and stir-fry for 30 seconds. Reduce the heat to low. Push the ingredients up onto the sides of the wok. Stir the sauce mixture, add it to the center of the wok, and stir constantly until the sauce begins to bubble and thicken. Add the reserved velveted chicken and stir to combine with the sauce. Slide the vegetables to the bottom of the wok. Cook, stirring often, until the chicken is hot in the center and just cooked through, about 1 minute. Turn off the heat, stir in the cashews, and serve.
Comments from 3 home cooks across the US who tested this recipe: “Great texture—chicken is really velvety. If you follow the cooking times, you can’t go wrong—even if you’ve never stir-fried before. Will use this velveting technique for other chicken stir-fries…Tastes great and looks terrific. Will definitely make this again, next time for guests…Very tender chicken. Cashews delicious cooked this way…Great color, pretty. So much healthier than the old oil-blanching method. A no-fail dish for guests—looks complex enough that people will think you’re a pro. Seasoned just right, but would recommend serving soy sauce on the side, just in case—my wife and I both like saltier food—we added soy sauce at the table…A pleasant surprise that so few ingredients and relatively simple prep turned out so attractive and flavorful. Tasty, smooth, tender chicken!…Yum! Fresh, light, love the cashews. Great balance of colors—looks like a spring dish. My girls, 4 & 9, loved the tender chicken. A winner—great that chicken can be prepped and marinated a day ahead.”
Copyright Linda Carucci. All rights reserved.
Muhammara with Grilled Flatbread
Adapted from Cooking School Secrets for Real World Cooks by Linda Carucci
Pronounced moo-HAH-mah-rah, this addictive spread is popular in Turkey, Syria, and Lebanon, where it is served as a flavorful spread with grilled flatbread or as an accompaniment to grilled kebabs of fish, chicken, or lamb. Look for pomegranate molasses and Aleppo pepper in Middle Eastern markets, well-stocked grocery stores or specialty markets. To make a gluten-free version, simply omit the bread. The spread will be a little thinner, but will still be thick enough to work as a dip or condiment.
Serves 8 (makes about 1 cup muhammara)
Muhammara
Optional: 1 slice white bread, crust removed
1 cup walnuts (plus a few for garnish), toasted
2 tablespoons extra virgin olive oil
2 tablespoons pomegranate molasses, plus more for serving
1 tablespoon tomato paste
1 cup roasted red bell pepper strips, homemade or jarred
1 teaspoon ground cumin, toasted
1 teaspoon kosher salt
1/2 to 1 teaspoon coarsely ground Aleppo pepper or 1/2 teaspoon Hungarian paprika
Optional: About 1 teaspoon sugar
Grilled Flatbread
4 pita bread rounds
Extra virgin olive oil, for brushing
Prepare the muhammara: If using, tear the white bread into pieces and place in a food processor. Process into crumbs. Add the walnuts, olive oil, pomegranate molasses, tomato paste, roasted peppers, cumin, kosher salt, and 1/2 teaspoon of the Aleppo pepper and then process until smooth, scraping the work bowl occasionally. Taste and bring the flavors into balance by adding more salt, Aleppo pepper, pomegranate molasses, and/or sugar, as necessary. The muhammara should taste bright and vibrant. Transfer to a bowl, cover, and let stand for at least 20 minutes for the flavors to meld. Taste again and adjust the seasoning, if necessary.
Prepare the grilled flatbread: Preheat a stovetop grill or other grill. With clean kitchen scissors, cut each pita bread around its circumference and separate each bread into two circles. Brush both sides of the breads lightly with olive oil. Grill until toasted on both sides. Transfer to a cooling rack; the flatbreads will become crisp as they cool.
To serve: Spread the muhammara on a large, flat platter. Drizzle with a liitle pomegranate molasses and sprinkle with a few of the remaining crumbled walnuts. Arrange a stack of grilled flatbread alongside the platter and break off pieces of flatbread to scoop up the muhammara.
Copyright Linda Carucci. All rights reserved.
Red Pepper Bisque
Adapted from Cooking School Secrets for Real World Cooks by Linda Carucci
For the past several years, this has been the workhorse recipe I use in my Cooking Basics classes to teach the concept of seasoning to taste. It’s a fairly simple recipe for beginner cooks to replicate at home. A bisque (pronounced bisk) is a smooth, puréed soup, often made with seafood, and usually enriched with cream. When made with lobster or shrimp, a bisque is sometimes thickened or enriched by adding a tablespoon or so of raw white rice when the stock is added. The rice disintegrates as the soup cooks, releasing its starch and thickening the soup in the process. Given the texture of peppers or mushrooms, it’s not necessary to add rice to a bisque made with either of these vegetables, but a little cream goes a long way to enhance the “mouth feel” of a bell pepper or mushroom bisque. To enhance the satisfying sensation of umami, this vegetable bisque is prepared with chicken stock or broth. But, if you prefer a vegetarian soup, simply substitute commercial or homemade vegetable broth. The amount of salt you’ll need when seasoning to taste depends on the saltiness of your stock.
Secrets
- This recipe calls for 1/4 to 1/2 teaspoon cayenne pepper. The smaller amount will simply add a note of complexity without the heat. More makes the soup spicy.
- If you double a recipe that calls for spicy-hot ingredients such as cayenne pepper, don’t double the spicy ingredients. The capsaicin (pronounced cap-SAY-ih-sin), which gives cayenne and other hot spices their heat, increases exponentially as you add more of the spice. Start with “one times” the cayenne, and, if desired, add more when you season the soup after it’s cooked.
- Dairy products such as cream and yogurt mitigate spicy heat. As an eye-catching counterpoint to the cayenne, garnish this soup with a drizzle of crème fraîche (pronounced crem fresh) or a dollop of sour cream.
- As with most soups, this bisque tastes better the next day. If you prepare it a day ahead, season it with salt and pepper, but don’t add the cream until you reheat the soup.
Serves 4 to 6
3 tablespoons extra virgin olive oil
1 large carrot, peeled and chopped
1 medium yellow onion, peeled and chopped
1 stalk celery, chopped (if you don’t plan to strain the soup, peel before chopping)
1/4 to 1/2 teaspoon cayenne pepper
4 medium red bell peppers (about 1-3/4 pounds), stemmed, seeded, and chopped into roughly 1-inch pieces
About 4 cups chicken stock, homemade or low-sodium, if canned
1/4 cup heavy cream
Kosher salt
Freshly ground black pepper
About 2/3 cup crème fraîche or sour cream, stirred to a smooth consistency, for garnish
Place a heavy 4-quart pot over medium-high heat. Add the olive oil. When the oil is hot enough to sizzle a piece of carrot, add the carrots, onion, and celery. Sauté until the carrots turn bright orange and the onions become translucent, about 8 minutes. Stir in 1/4 teaspoon of the cayenne pepper and add the bell peppers. When the peppers start to soften, after about 5 minutes, add enough stock to just cover the vegetables and bring to a rolling boil. Reduce the heat and simmer, partially covered, until the carrots and peppers are soft, about 30 minutes.
In an electric stand blender, purée the soup in batches until very smooth: Blend just 2 cups at a time and hold down the blender lid as you slowly increase and decrease the speed. Alternatively, purée with an immersion blender. If desired, strain the puréed soup through a medium-mesh strainer into a clean pot. As you strain the soup, extract as much pulp as possible from the solids by pressing on them with the bottom of a ladle.
Stir in the heavy cream and season the soup to taste with kosher salt and black pepper, as well as additional cayenne pepper, if desired. If necessary, reheat the soup over low heat, stirring constantly. Ladle the soup into warm bowls and drizzle with crème fraîche or garnish with a dollop of sour cream.
Variation: Substitute unseasoned Roasted Peppers—red, yellow, or green—for the raw bell peppers. If you plan to strain the soup, you needn’t peel the peppers after roasting them.
Comments from 3 home cooks across the US who tested this recipe: “Very easy soup to make and quick: 35 minutes from start to finish. …You can’t mess up this recipe…I discovered that what I own is a fine-mesh strainer, and just as you predicted, it separated out too much of the pulp. So I ended up putting some of the pulp back in because I liked that texture better…I used a blender and didn’t strain (I like the slight pulpiness)…I served a quesadilla with this and they went well together.”
Copyright Linda Carucci. All rights reserved.
Ribeye Steaks with Arugula, Blue Cheese and Grilled Red Onions
Adapted from Cooking School Secrets for Real World Cooks by Linda Carucci
As a young girl, I discovered an affinity for blue cheese when my father took us to a favorite lunch spot near his office in Brookline, Massachusetts. Jack and Marion’s has long since been shuttered, but I’ll never forget their super-thick grilled hamburger, piled ridiculously high with a dome of soft, creamy—and yes, strong—blue cheese, and a hefty slab of red onion. The flavor combination is classic—here’s it’s augmented with a sprightly arugula salad in a family-style meal that’s fit for a special occasion. Add a big platter of corn on the cob and a crusty loaf of bread, and the feast is complete.
Secrets
- When I moved to California, I could never find the tender, flavorful, boneless Delmonico steaks I grew to love on the East Coast. When I took Butchery in cooking school out west, I learned that butchers in different locations have different names for the same cut of meat. Delmonico steaks were given the name of the New York restaurant that made them famous. In California, when Delmonico steaks are cut from the rib roast, they’re sold as ribeye steaks.
- For the best flavor and texture, season the steaks with salt, pepper, and good quality garlic powder the day before you serve them. Refrigerate the steaks, uncovered, for up to 36 hours. For even cooking, bring them to room temperature an hour before grilling.
- I love Fine Cooking magazine, especially for their great tips and secrets, such as how to grill thickly sliced onions. To ensure they’ll cook all the way through before the outside edges burn on a hot grill, give them a head start by first microwaving them on high for 3 minutes (or steam them over boiling water). To prevent the onions from coming apart on the grill, skewer them with toothpicks. Use round toothpicks, and twist them in, leaving no exposed ends to burn. If needed, use a pair of fish tweezers to remove the toothpicks.
- You can buy blue cheese already crumbled, but to save money and ensure quality, buy a wedge of cheese and crumble it yourself. To prevent the cheese from melting all over your fingers, place a wedge of cold cheese on a plate and use a fork to crumble it, letting it fall onto the plate.
Serves 3 to 4
Steaks
Three 3/4-inch-thick, boneless beef ribeye steaks, about 2 pounds total
1-1/2 teaspoons kosher salt
3/4 teaspoon freshly ground black pepper
3/4 teaspoon granulated garlic powder
1 tablespoon minced fresh thyme leaves, from about 10 sprigs
Salad and Onions
1 large red onion, cut into 3 or 4 half-inch-thick slices
About 3 tablespoons extra virgin olive oil, divided
Kosher salt
Fine, freshly ground black pepper
2 bunches arugula (about 6 ounces total), washed and dried
1 large handful flavorful cherry tomatoes, cut in half lengthwise
1 tablespoon balsamic vinegar
4 ounces Maytag blue, Stilton, or other firm, but crumbly blue cheese, crumbled
Prep the steaks: Remove all the external fat from the steaks and place them in a single layer on a large flat platter. Season both sides of the steaks with the salt, pepper, and garlic powder. Press the seasoning into the steaks with the heel of your hand. Sprinkle each side of each steak with 1/2 teaspoon minced thyme, and then press it in. Refrigerate the steaks, uncovered, up to 36 hours.
Remove the steaks from the refrigerator 30 minutes before cooking. Prepare a charcoal fire or preheat a gas grill to very hot.
Prepare the onions: Skewer each slice of onion with two toothpicks twisted in crosswise from opposite sides to hold the layers together while grilling. Push the toothpicks in as far as possible to prevent any exposed ends from burning. Place the onions on a microwave-safe plate and microwave on high for 3 minutes. (Or steam for 5 minutes on a steamer rack above boiling water.) Brush both sides of the onions with about 1 tablespoon of the olive oil and sprinkle lightly with salt and pepper. Grill the onions, turning as necessary, until soft and golden brown on each side, about 10 minutes total. Transfer the onions to a flat surface, twist out the toothpicks, and discard the picks. Separate the onions into rings and transfer them to a large bowl that you’ll use to toss the arugula salad. Set aside.
Grill the steaks on both sides to desired doneness, 5 to 7 minutes total for rare (125 degrees F) or 7 to 10 minutes total for medium (135 degrees F).
Prepare the salad: While the steaks are cooking, add the arugula, cherry tomatoes, 2 tablespoons extra virgin olive oil, and the balsamic vinegar to the bowl with the onions and toss to combine. Season to taste with salt and pepper. Transfer the arugula salad to one side of a serving platter large enough to also accommodate the steaks after they are sliced.
When the steaks are done, transfer them to a cutting board, tent with foil, and let stand for 5 minutes for the juices to retract. Slice the steaks crosswise into roughly 1/2-inch strips. Use a bench scraper or large spatula to transfer the slices onto the platter. Drizzle the meat with any carving juices and then sprinkle with the blue cheese.
Comments from 3 home cooks across the U.S. who tested this recipe: “Strikingly beautiful, scrumptious. Blue cheese and beef is such a classic combination, but none of my friends had tried it—they’re now believers. Next time I will put onions in my grilling tool that’s for fish—would hold them together without toothpicks, could turn all at once. Really wonderful recipe. Look forward to making this again…I cooked the steaks to medium—135 degrees—on Weber gas BBQ with the top up for the duration—your timings are perfect. I was somewhat apprehensive about cooking onions on a “very hot” grill for 10 minutes—turned them often and got great flavor. Salad is wonderful—bitterness of arugula offset nicely by balsamic and blue cheese. Could serve just the steaks with those amazing onions.”
Copyright Linda Carucci. All rights reserved.
Baked Macaroni with White Cheddar and Buttered Bread Crumbs
Adapted from Cooking School Secrets for Real World Cooks by Linda Carucci
When I teach Sauces classes, this adult version of good ol’ Mac and Cheese is the recipe I use to demonstrate the distinctions between béchamel (pronounced BAY-shah-mel) and Mornay sauces. In béchamel, a white sauce is thickened with roux (pronounced ROO). Roux is a combination of butter and flour that are cooked together until the flour loses its raw flavor and the starch grains are coated in fat, making them less likely to become lumpy when milk is ultimately added. Béchamel is one of the classic French “mother”–or primary– sauces. (There are four or six mother sauces, depending on whom you listen to.) Mornay sauce, which is a derivative of béchamel, is made by simply adding cheese to béchamel.
In cooking school, back in the day, it was drilled into us that in order to make a smooth béchamel, the roux and the milk couldn’t both be hot or cold—one had to be the opposite temperature of the other. Since we always scalded the milk first, we were taught to cook the roux, then spread it thin on a baking sheet, and place it in the freezer to chill quickly. We’d then break off pieces of frozen roux and whisk them into scalded milk. This seemed too complicated for such a simple sauce, so I did some sleuthing and discovered that scalding the milk was a vestige from pre-pasteurization days. You’ll see how simple it is, instead, to add cold, pasteurized milk to a hot roux. Voila! For a quicker, non-baked version of this recipe, try the Macaroni and Cheese variation at the end.
Secrets
- The best pasta for saucy dishes such as this are macaroni shapes that have built-in pockets that allow the sauce to wend its way inside. Elbow macaroni are traditional in Mac and Cheese, but I like medium-sized shells, penne, mostaccioli, or even gemelli. Since this recipe calls for only 12 ounces of pasta, if you’re buying a 1-pound box, choose a shape whose leftovers you’re likely to use in a soup or side dish.
- Here’s how to keep pasta firm when preparing casseroles like this that call for boiling the pasta, then baking it in a sauce: Boil the pasta to just before the al dente stage, or about two-thirds of the time specified on the package. The pasta should taste very firm and chewy, but not hard inside. To stop the cooking immediately, have a glass of cold water ready to dump into the pasta cooking water as soon as it’s done. Immediately drain the pasta in a colander.
- For flavorful pasta, be sure to use enough salt in the pasta cooking water to make it taste like the ocean. And never add oil to the water when cooking pasta; it would cause the pasta to repel—rather than absorb—the sauce.
- To make buttered, toasted bread crumbs, I remove the crusts from the bread so the crumbs brown evenly. The most efficient and least wasteful way I know to remove the crusts from day-old bread is to cut the loaf in half widthwise. Stand the flat ends of each half on a cutting board. Use a serrated knife to shave off the crusts, starting at the top and working your way down. (For this recipe, weigh the bread before you shave off the crusts.)
- A flat whisk is my preferred tool for making roux-based sauces such as béchamel, Mornay, and pan gravy. Its distinctive shape allows all the tines to come in contact with the surface of the saucepan.
- Use the large holes of a box grater to shred semi-soft cheeses such as cheddar. If you prefer a more traditional, orange-tinged Mac and Cheese, substitute orange cheddar for the white variety.
Serves 6
Mornay Sauce
6 tablespoons unsalted butter
5 tablespoons all-purpose flour
3 cups cold whole milk (2 percent is okay)
2 teaspoons kosher salt
A few dashes of Tabasco sauce or 1/4 teaspoon cayenne pepper
2 cups (8 ounces) shredded sharp white cheddar cheese, divided
Macaroni
Kosher salt
12 ounces shell macaroni or other pasta shape, cooked in boiling, salted water to almost al dente, drained (see note above)
Buttered Bread Crumbs (Makes about 1-1/2 cups crumbs)
8 ounces dense Italian or French bread (not sourdough), preferably day-old
2 tablespoons unsalted butter
1/2 teaspoon kosher salt
Prepare the Mornay sauce: In a heavy 2-quart saucier or saucepan, melt the butter over medium heat. When the foam subsides, whisk in the flour. Cook for 2 minutes, whisking constantly. Add the milk, 1/4 cup at a time, whisking constantly. Have faith and continue to whisk constantly as you add more milk to the lumpy mass. As each addition of milk is absorbed, add more. Once the mixture is smooth, add the remaining milk all at once. Switch to a slotted wooden spoon and stir constantly in a figure-8 pattern over medium heat until the sauce thickens and begins to simmer, 8 to 10 minutes. Drag your finger over the back of the spoon. The sauce is done when it reaches napé (pronounced nah-PAY), which is when the sauce is thick enough that the track from your finger remains intact. Remove from the heat and stir in the salt and Tabasco. To transform this béchamel sauce into Mornay sauce, add half (1 cup) of the shredded cheese, a little at a time, stirring as you add each handful. Stir until the cheese is melted. Taste and add more salt or Tabasco, if desired. Cover and set aside.
Preheat the oven to 375 degrees F. Butter a 9- by 9- by 2-inch square or other shallow 10-cup baking dish. Set aside.
Cook the pasta: Bring a 4-quart pot of water to a boil. Add enough salt to the boiling water to make it taste like the ocean. Cook the pasta for about two-thirds of the time indicated on the package, stirring occasionally. Add a glass of cold water to the pasta to stop the cooking. Drain the pasta, add to the pot of Mornay sauce, and stir to combine. Transfer to the prepared baking dish. Top with the remaining 1 cup cheese and set aside.
Prepare the buttered bread crumbs: Remove and discard the crusts from bread using a serrated knife. Tear the bread into roughly 1-inch pieces. Process the bread in a food processor or blender until the crumbs are no larger than 1/2 inch. Melt the butter in a 10- or 12-inch (preferably nonstick) skillet or sauté pan with sloping sides. When the butter is hot enough to sizzle a bread crumb on contact, add the bread crumbs. Sauté, stirring (or flipping), constantly until the crumbs turn a very pale golden brown, about 5 minutes. Transfer the crumbs to a bowl to prevent them from browning further. Sprinkle with salt, toss, and strew the bread crumbs evenly over the cheese-topped pasta.
Bake, uncovered, until casserole is piping hot throughout (insert a butter knife in the center and touch the knife blade to see if it’s hot enough) and crumbs are golden brown, about 30 minutes. Let rest 5 minutes to set up a bit before serving.
Macaroni and Cheese Variation
Omit the bread crumbs. Proceed as directed for cooking the pasta and making the Mornay sauce, adding all the cheese to the sauce. After combining the pasta and sauce, reheat over medium heat, stirring constantly with a silicone spatula until the pasta is piping hot.
Comments from 3 home cooks across the U.S. who tested this recipe: “Excellent. Tip top. My boyfriend says this is up there with the best Mac and Cheese he’s ever had. It reheats well, although it wasn’t nearly as great as the first night. I didn’t believe you could make bread crumbs in a blender–made great fluffy bread crumbs in 4 batches in my Vita-Mix. A simple green salad was a nice compliment, as was a Duckhorn Merlot…Great texture—Mornay sauce is smooth and creamy, pasta perfectly done, cheese under bread crumbs is perfectly melted, bread crumbs have a nice crunch. Excellent flavor. Sharp (rather than extra-sharp) cheddar didn’t overpower the other ingredients…The dish looks wonderful with the crunchy bread crumbs and bubbling cheese. Mmmmmmmmm. The suggestion to slightly undercook pasta before baking kept it from being mushy. I used DeCecco Conchiglette (small shells). A bit time-consuming to make Mornay, cook pasta, then bake it all, it was well worth the effort. Delicious, but my 2-year-old daughter didn’t like it at all…This dish should be in the dictionary to illustrate the definition of comfort food.
Copyright Linda Carucci. All rights reserved.
